Apple, in its infinite wisdom, has not included a Kensington lock slot in the current model of the MacBook Pro computer. Given the computer's price, desirability, and the fact that three people I know have had theirs stolen, I decided to build an improvised adapter that would allow me attach a Kensington lock to the computer. I realize, that the security offered by such a contraption is what my colleague Vassilis Prevelakis calls an "advisory lock", for Kensington locks can be easily picked or pried away. However, I think it might deter a casual thief who would snatch the laptop you've left unattended for a couple of minutes.
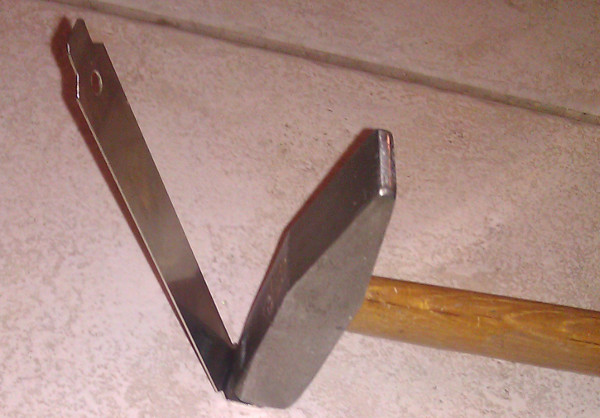
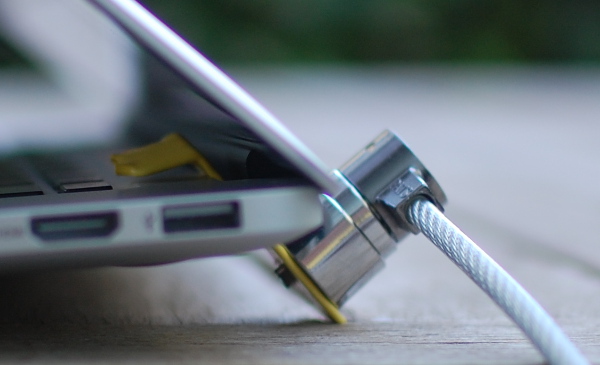
The adapter is an L shaped piece of metal that will slide into the slot between the laptop's screen and body. Note that the slot is widest when the screen is half-open. To use the lock, you slide the adapter into the slot from the front, and attach the Kensington lock cable to the adapter's part protruding from the computer's back. Here is how to build it.
- Find a PC expansion card cover plate.
Most modern ones seem to be made of truffle,
so try to get an older one made from a more sturdy material.

- Bend the plate an additional 15 degrees, and straighten any
protrusions it might have on its top part.
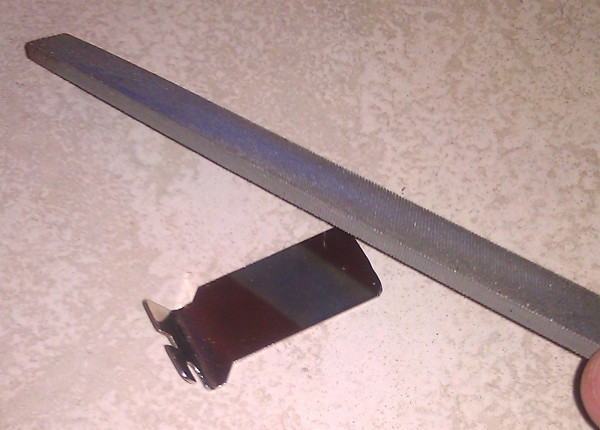
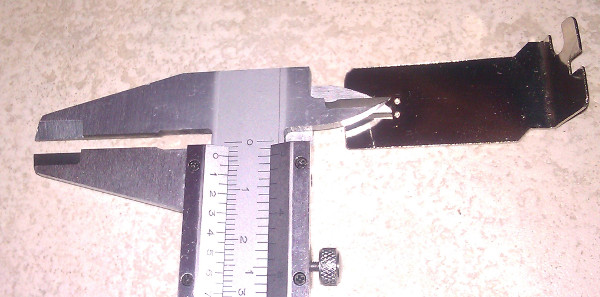
- Cut the plate's long part to 4cm length.
- File the edge you cut to smoothen any rough parts.
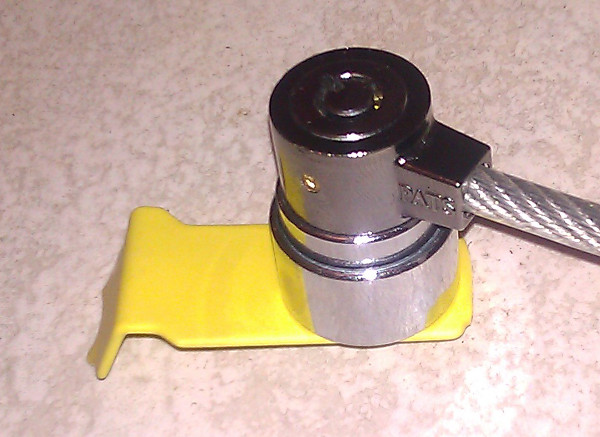
- Punch two guide holes 3mm apart close the end of the plate's long part.
This is where the lock will attach itself.
- Measure carefully the distance between the holes;
if the holes are too far apart, the lock will not stay in.
As the carpenters say: "measure twice, cut once".
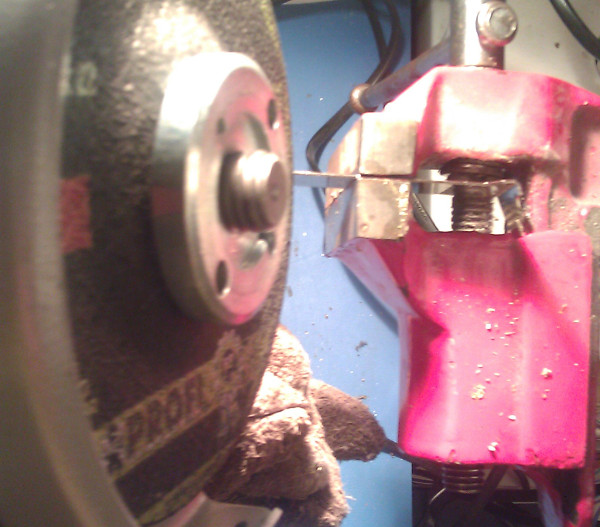
- Drill two holes at the positions you marked.
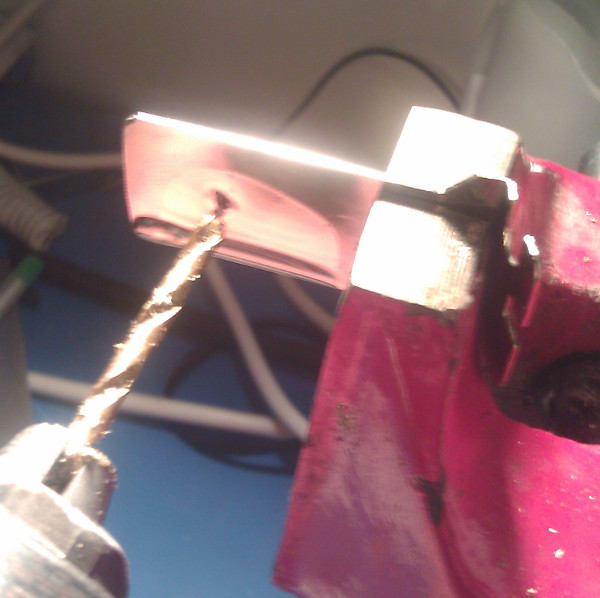
- You're drilling metal, so remember to
use a corresponding drill bit,
apply lubrication,
and use a low drill speed (below 1000 RPM).
- Combine the two holes into one, by applying drill pressure
on each hole's edge.

- Along the way test to see when the lock can fill into the hole.
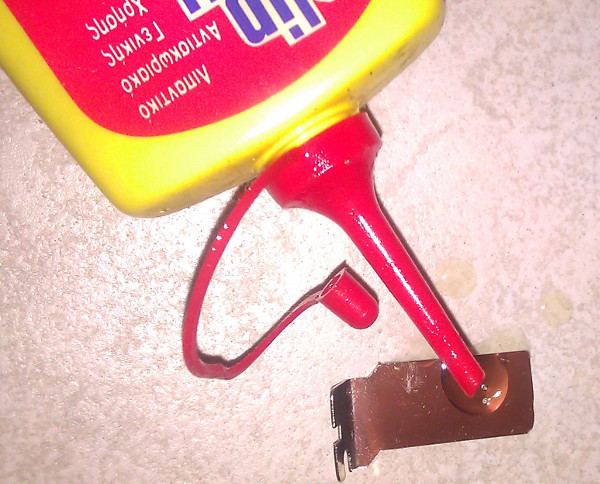
- To prevent the adapter from scratching your laptop,
apply a heat-shrink tube around it.

- Finally, cut the plastic around the hole, so that the lock can
fit again on the adapter.
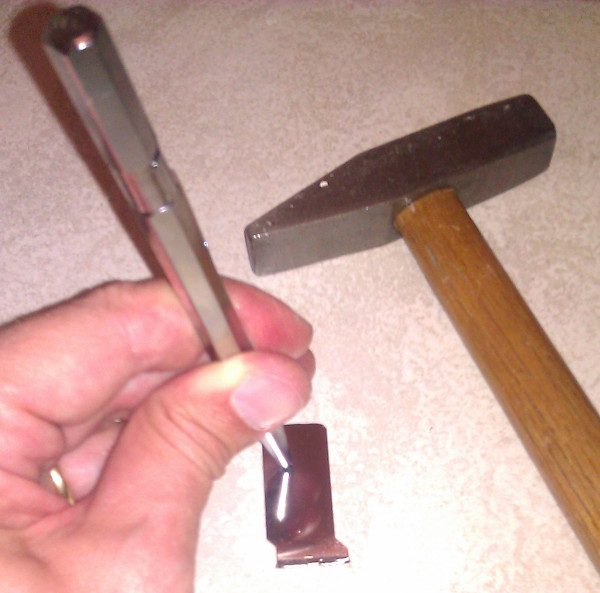
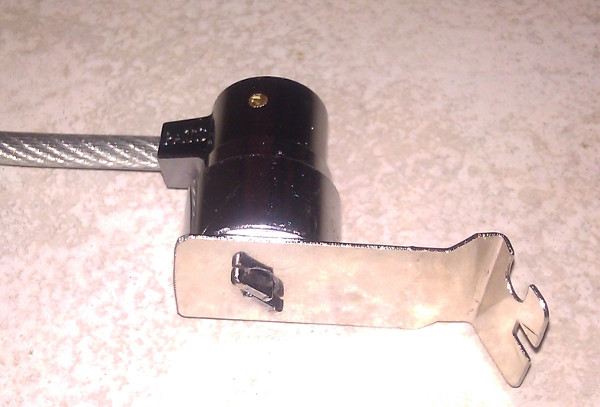
- Here is the lock and the adapter used in practice.
Important Notes
- The lock will not protect your laptop from a slightly determined thief; always secure your laptop in a proper way.
- When the adapter is attached, do not attempt to open or close the screen, because you're likely to break or deform something.
- Machining the adapter involves the handling of dangerous power tools. Wear personal protection (clothes, glasses, ear muffles, gloves, mask), and ensure that you're appropriately trained or supervised.


Why I Choose Email Over Messaging (2025-09-26)
Is it legal to use copyrighted works to train LLMs? (2025-06-26)
I'm removing the BSD advertising clause (2025-05-20)
The perils of GenAI student submissions (2025-04-11)
Unix make vs Apache Airflow (2024-10-15)
How (and how not) to present related work (2024-08-05)
An exception handling revelation (2024-02-05)
Extending the life of TomTom wearables (2023-09-01)
How AGI can conquer the world and what to do about it (2023-04-13)
Last modified: Monday, June 10, 2013 6:41 pm

Unless otherwise expressly stated, all original material on this page created by Diomidis Spinellis is licensed under a Creative Commons Attribution-NonCommercial 4.0 International License.